How do I set up Outlook 2016?
Step 1:
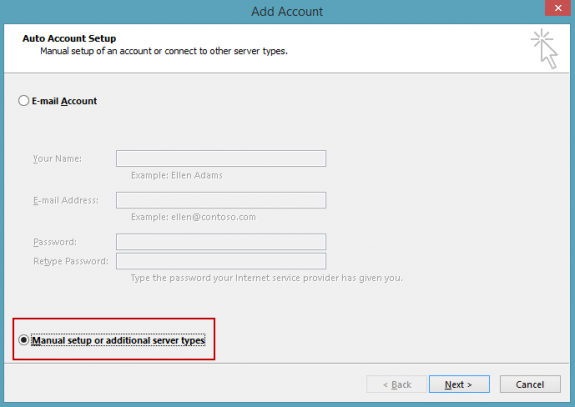
Open Outlook and select
Manual setup or additional server types
and click the Next button.
Step 2:
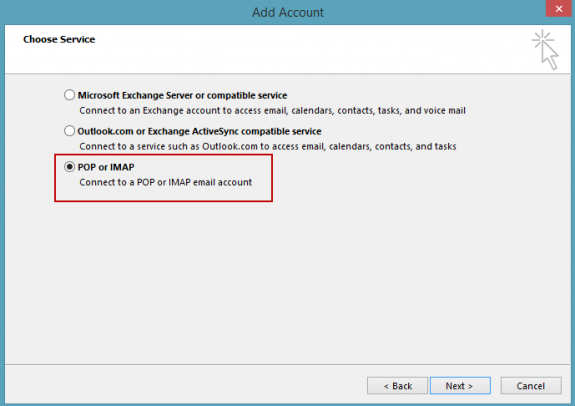
From the Choose Service screen, Select
POP or IMAP and click
the Next Button
Step 3:
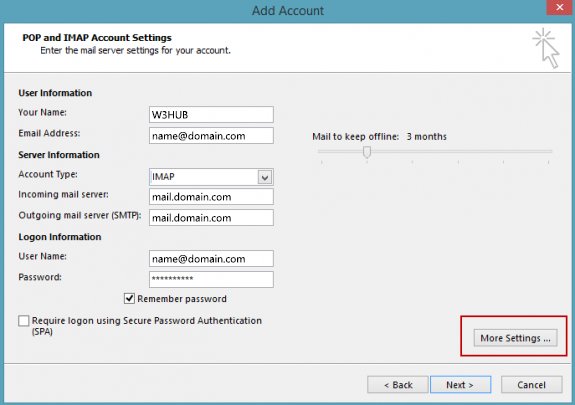
From the POP and IMAP Accounts Settings screen, enter all the necessary
information and select More Settings.
|
Settings
|
Required Information
|
|
Your Name
|
Enter the name you would to be displayed in the
from field when somebody receives your email
|
|
Email Address
|
Your Full Email Address of the
email box that you are currently setting up
ex: info@yourdomain.com
|
|
Account Type
|
Select
POP3
or IMAP
This guide uses IMAP setup
|
|
Incoming mail server
|
mail.<yourdomainname.com>
ex: mail.mycompany.com
|
|
Outgoing mail server (SMTP)
|
smtp.<yourdomainname.com>
ex: smtp.mycompany.com
|
|
User Name
|
Your Full Email Address of the
email box that you are currently setting up
ex:
info@yourdomain.com
|
|
Password
|
Enter the password that you set
when you created the mailbox in your account manager.
Note: It is recommended that you also select
Remember Password unless multiple users have access to your profile on
your computer.
|
|
Require logon using Secure Password
Authentication (SPA)
|
Unchecked
|
|
Deliver new messages to:
|
New Outlook Data File
|
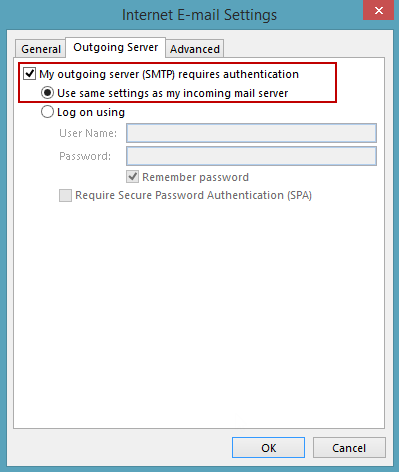
Step 4:
More Settings will pop up a new window that has 3 tabs.
Select the Outgoing Server
tab.
From the Outgoing Server tab, select
My outgoing server (SMTP)
requires authentication and then select
Use same settings as my
incoming mail server.
Step 5:
Select the
Advanced Tab from the same popup window. Change
the Outgoing server (SMTP) port to
25.
Select None for encrypted connection. Then click OK.

Step 7:
You will be returned to the POP and IMAP Account Settings screen. From here,
you simply click on the Next button.

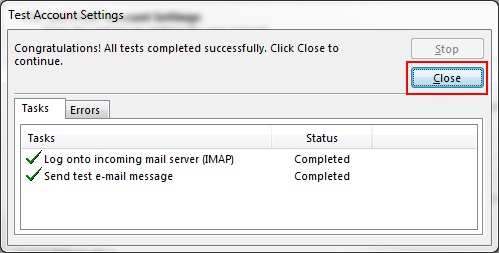
Step 8:
Outlook will then attempt to test your account settings. Let the process
complete until you are presented with a screen that says: Congratulations.
Simply click Close.
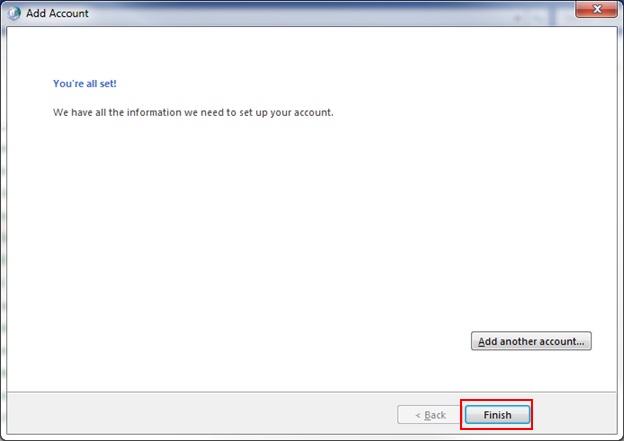
Step 9:
You’re all set. You may then click
Finish.
Your Outlook is now set up and you can begin to use it.